
What the Flutter? ExpansionPanel


A common pattern in apps is to have a list of items that you can expand to show more details. Sometimes these details don’t justify an entirely separate view, and you just need them to show up inline in the list. For that, check out ExpansionPanel, a widget that when tapped on will expand a panel.

Start with the headerBuilder, which returns what the first line of this panel will be. It takes a context and a boolean, so you can change what it looks like when the panel is open vs closed and returns a widget. Next up is the body, which contains the contents of the opened panel. And finally is the boolean isExpanded to indicate whether or not this panel is currently open. But what to do with this flag?

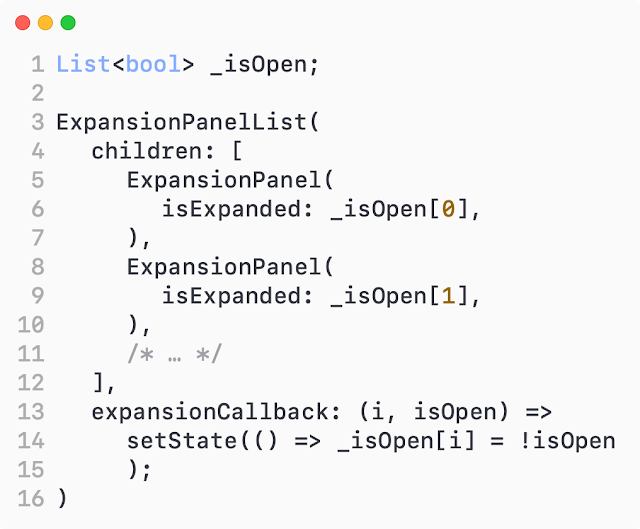
Well, ExpansionPanels almost exclusively appear as children of ExpansionPanelLists. Here, we can maintain a list of which panels are open and use ExpansionPanelList’s expansionCallback parameter to update them. This callback takes an index of the panel that’s just been tapped and whether it’s currently open or not.

Assuming your ExpansionPanelList is in a stateful widget, you can setState to toggle the flag and use this value in each ExpansionPanel’s isExpanded. And that’s pretty much it! But you’re also able to customize how the panel looks with the list animationDurationdividerColorelevation, and expandedHeaderPadding, or use the panel’s canTapOnHeader flag to say whether or not the whole header is tappable for expansion.

Let’s see the example:


For more on ExpansionPanel and all the other widgets, head on over to flutter.dev

Comments

Popular posts from this blog

How to build FAQ Chatbot on Dialogflow?

  After Google I/O I’m inspired and excited to try new APIs and learn new stuff from Google. This time I decided to try Dialogflow and build a Flutter Chatbot app that will answer some frequently asked questions about Dialogflow. This time I want to be focused more on Dialogflow rather than Flutter. Firstly, go to  Dialogflow ES console , create a new Agent, specify the agent’s name, choose English as a language and click “Create”. As you created a new agent go to setting and enable beta features and APIs and Save. Now let’s model our Dialogflow agent When you create a new Dialogflow agent, two default intents will be created automatically. The  Default Welcome Intent  is the first flow you get to when you start a conversation with the agent. The  Default Fallback Intent  is the flow you’ll get once the agent can’t understand you or can not match intent with what you just said. Click  Intents > Default Welcome Intent Scroll down to  Responses . Clear all Text Responses. In the defau

Vertex AI – One AI platform, every ML tool you need

  This year on Google I/O (Google’s Developer conference) Google presented a new platform that unites all ML tools. Vertex AI brings together the Google Cloud services for building ML under one, unified UI and API. There are many benefits to using Vertex AI. You can train models without code, with minimal expertise required, and take advantage of AutoML to build models in less time. Also, Vertex AI’s custom model tooling supports advanced ML coding, with nearly 80% fewer lines of code required to train a model with custom libraries than competitive platforms. Google Vertex AI logo You can use Vertex AI to manage the following stages in the ML workflow: Define and upload a dataset. Train an ML model on your data: Train model Evaluate model accuracy Tune hyperparameters (custom training only) Upload and store your model in Vertex AI. Deploy your trained model and get an endpoint for serving predictions. Send prediction requests to your endpoint. Specify a prediction traffic split in your